Saturday, 28 July 2012

Girly camo nail art

Hi! 
Firstly how amazing was our opening ceremony ;)? I couldn't stay up to watch all the athletes entering the stadium (I went to bed before Team GB!) but I really loved every second of it :D I can't wait for gymnastics and swimming as Rebecca Adlington comes from my home town!! Woo :D. 
Anyway I wanted to do camo nails so bad ever since I saw Madeline Poole's nails that she did a while ago, they just look fun in my opinion. I know though that this won't be everyone's cup of tea and that's fine as I like them hehehe. 
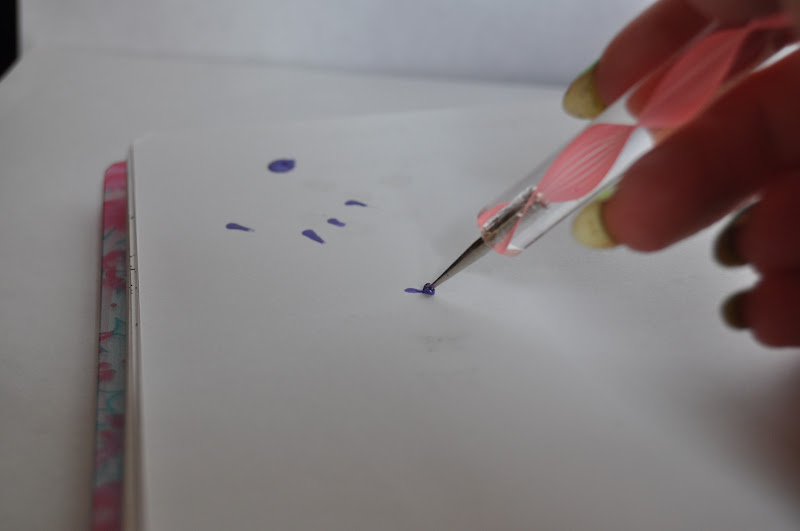
They are really easy to do but like I discovered they can look really stupid if you do it wrong lol I know that's a kind of contradiction but when I first tried on paper I had no idea what I was doing, so I gave it a few practise runs then dived in and they look like camouflage so that's all good. 
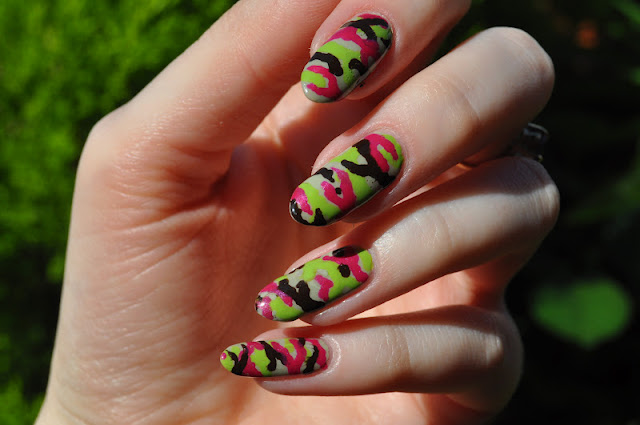
 I don't know why my index nail looks so bulbous :( it's not really like that, it's slim I swear!

Sorry about the shadows! It's just too sunny here ;)
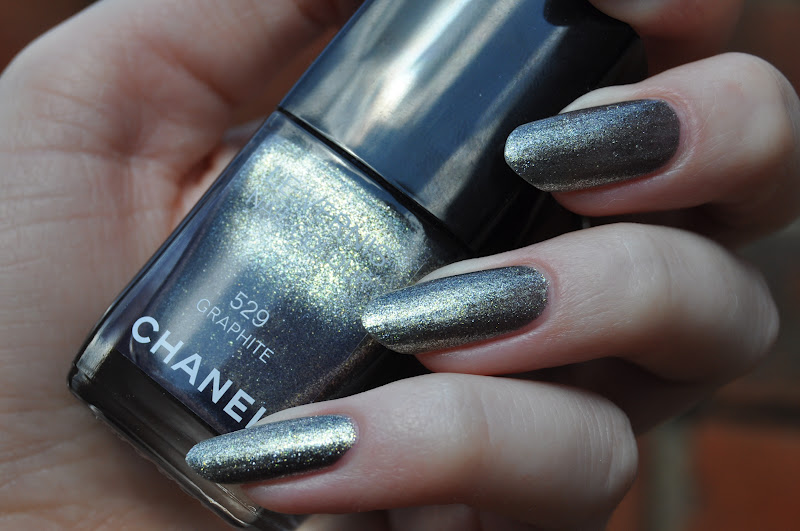
I started with OPI Stranger Tides as it's a nearly khaki shade :P plus it's nice and light and so can take other colours easily. I used the smallest and pointy dotting tools and just dipped and dragged ;) and dotted the shapes on, starting with the lime green which is Gosh Early Green, then the pink which is an unamed Barry M and finally the brown which is Essie Little Brown Dress. I had to take photos in amongst the trees as that was where the sun was annnnd it's camo y'know ;). This design looks better in real life, it's fun! 


I'm posting this early as I have my first ever paid photography job later! I'm really nervous even though it's a family friend as I'm more used to shooting fashion/fine art not weddingy stuff. I'm photographing the bride getting ready and I'm stressing about the lighting, hopefully she'll be by a big window that would be ideal otherwise the indoor lighting will just cast a horrid yellow cast on her :(. Gah stop freaking maaaan lol. Then I'm off to her wedding reception which should be fun :). 


Have a great weekend everyone!

Wednesday, 25 July 2012

Floral print on the worst franken EVER

I just need to mention the removal of Zuza was baaad, I didn't use a basecoat for some unknown reason and so after I took it off I had zombie nails, not fun. Anyway for the design I had in mind I wanted a different nude than I had i my stash so I decided to mix my own. Bear in mind I only actually own two nudes both of which I've shown on here so I mixed both of those together with lots of white and I ended up with basically a slightly lighter version of Essie Sand Tropez with a touch of pink. For some reason I added some clear ? and oh man it became the worst thing to apply, I know how Frankenstein must have felt when he created his monster. I'm not sure if it was the extreme heat that made the formula so crap or just the clear but ugh it was like painting with glue! Hence the bad photo
 It bubbled and lumped and was stringy and gloopy but I kind of like the colour but only for this design :P. The design is my interpretation of this tee shirt I have, I got it donkeys years ago from Topshop but I still love it. I thought it would make for pretty cool nails and I think I was right ;)


 The little finger nail went wrong but I couldn't be bothered to re do it especially with that awful formula haha. By the middle finger I was really into the swing of the design. So that's why the better fingers are from the middle onwards, it always happens that way! I used my nail supreme pens in red, blue and pink, the black was done with my wah pen and the green is Barry M Spring Green applied with a dotting tool. 


This design looks a lot better in real life, it's not quite translating onto pictures as well as I'd like, it looks okay in this one though ;) it's so hard to take photographs of your right hand using a camera that's made to be used with your right hand :P. The good thing about this design like so many that I do, it doesn't matter if you mess up a bit like I did as it's easy to cover and making the flowers was easy as it's block colour so you can expand the shape. I think I captured the spirit of the design ;) well without showing my bf the tee shirt that it was based of he said 'that looks like your tee shirt!' Not bad for a boy eh? ;) I wish I had a bit more order to the black lines but I guess that would defeat the point of the design, hahaha. 
You might have noticed that my right thumb has a chunk of polish missing and that is because when I was cutting some cheese I slipped with the knife and sliced into my nail! I'm so lucky that my nails are really thick and that the knife only took the top few layers of my nail of otherwise it would have gone right through my thumb! I don't have much luck when it comes to sharp knives and cheese lol I sliced my finger open when trying to open a packet of cheese on my first day at uni, it was horrible lol sorry for that gory story :P. 

Monday, 23 July 2012

Zoya Zuza Swatches (finally)

It's Zuza time ;). 
The sun is lovely and perfect for Zuza to come out and play on my nails, I said I'd wear it today and that I am....obviously. I've taken my pictures outside as I could get them colour accurate and it's so sunny! Lol can't be inside when it's like that, it only happens once a year ;). 


Don't you just feel like you could swim in this? I am totally taking it on holiday with me, it's such a lovely colour, turquoise/aqua/greeeeeny blue whateves it's just beautiful :). I know it's been on every single blog but you have to see it to realise why. It was a pleasure to apply and dried pretty quickly. I didn't use a topcoat for these photos as it doesn't need it :) I feel like I'm on a foil hype lol but next time I'll hopefully have some nail art for you. 
All I can say about this is that I love it and thanks so much Lizzy! Can't wait to see Indigo Illusion now ;) 

Saturday, 21 July 2012

Chanel Graphite Swatches

So my Chanel finally arrived from ebay, 9 days after I paid! Really bad seller, she never replied to my messages and took so long to post it :( but I have it now and I had to put it on, it's so pretty!
I'm not just saying this because it's Chanel but honestly a great formula, it just glided over the nail, also because it's kind of foily/glittery it ignores all my ridges and makes me feel like I have nice nails again ;). 

 I know why it's called Graphite....it totally looks like sparkly pencil lead ;) hahaha the above photos show what it looks like in both the SUNNNNNNNN and the shade :( yes we have sun finally! We are meant to experience a heatwave this week which is funny as my dad is off to Australia tomorrow and it'll be hotter here than there :P. Anyway Graphite is so sparkly and grown up, I'm not sure if there is glitter in there or just magical sparkly stuff ;) either way it's darn pretty. The glittery stuff is a gold ish colour like in the top photo and so it creates a warm shimmer over the grey. 
I had to do an 'action' pose, it is Chanel after all ;) I love how chic it looks here though :). In case you're wondering I'm holding my new Phone purse, I love it! One half is a phone holder and the other side has three card slots and room for a few notes so its perfect if you only want to take your phone and a bit of money also hopefully it'll protect my phone when I inevitably drop it again :P mine was £14 from Topshop, they have a wide selection I suggest you look into them if you're a bit of  clutz like me ;). 


On Monday I will be posting Zuza! :D 

Friday, 20 July 2012

I need help acquiring the Dior Les Violets!

I have a major issue.....you know how I've been lemming the Dior Les Violets collection but it was only available in Harrods :( well they are now available on the nordsrom website and they don't deliver to the uk :( :(  this is a big favour to ask of my american readers but would anyone be willing to have them delivered to their house and then sent on to me? I'd put the money in your paypal account straight away for shipping costs too, I just REALLY WANT THEM lol. Email me or comment if you are willing to help a fellow nail addict! 

Wednesday, 18 July 2012

My guide to nail art, Part Two: Dotting Tools

Hi! I've been thinking of making this into a series of posts and if this one goes down well then I will :). I didn't even realise that today's Artsy Wedenesday challenge was dotting tools until I'd done all the designs haha. 


So todays post is all about the humble dotting tools, as with the last post this is all my own opinions and methods that I've figured out. If you don't have any dotting tools, why not? They are a couple of pounds off ebay and are easy to fix should they break like mine did. One of mine arrived broken so I simply fixed it with some blu tac, wrap it around the base of the dotter and simply push it back into the body and it will stay, et voila you can now use your once broken dotting tool :D 


There are three main sizes that I use almost every time 
You can see the blu tac sticking out of the yellow one :P. The smallest, a medium sized and the largest. The good thing about dotting tools is that you can get at least three different sized circles out of each dotter, depending on how much polish you use and how much pressure you apply. 


A method that I use when using dotting tools is the dip and drag method, you dip into a deep pool of polish and then put it to your nail and instead of dotting and pulling up, you dot and drag it along the nail. This can be used to fill in gaps of designs or draw lines (with the slimmest tool).   
This is my attempt to demonstrate the dip and drag, it'd be better as a video but I'm not ready to do a video :P. Like I explained earlier you dip in the pool of polish that you can see in the top of the paper, then you just put the dotter to paper and drag it until the polish runs out. 


I'm going to show you 8 mini tutorials, different ways to use a dotting tool, it doesn't just make circles ;). Under each of the steps with polish I've added an illustration to make it easier to see what I've done with the polish. 
First up is how to draw a moustache and panda eyes 
I hope these are pretty self explanatory, I used the largest tool for the big circles, the smallest for the lines and joining up the two different sized dots, using the dip and drag method. 

Next are flowers
Again I used the largest for the big circles on the first two flowers and the medium for smaller dots on the tulip shape, dragged the polish in a slight banana in between the two smaller dots. I prefer to do my flowers like the version two but it depends what look you're going for I guess :).

Leopard print and Butterflies
a-england Galahad, Kiko Melon, Nails Inc Chester Terrace, Kiko Dark Violet
Leopard print is one of the easiest designs to do with dotting tools as you literally can't go wrong, all you do it load your tool with polish and dot and drag around the splodge until you're happy but don't go all the way around. 
The butterfly is something I just thought of and I kind of like it, again it's simple but looks good, you don't have to leave it plain you can decorate the butterfly however you want, you don't have to do two colours either, I did to show the different shapes. 

Finally drips and hearts 

On the drip design the line of polish goes at either the tip or the base of the nail. I feel the first heart needs a little explanation, it's easy but you need to be quick. Dip and then drag in a v. If the polish runs out simply dip and drag again from the bottom of the v and that should sort it out. The second version takes a bit more effort but it looks quite cute ;). 

The thing to think about regarding dotting is to think of the circles as a means to an end, they don't have to be the final product, use the dots as a skeleton for other shapes and the possibilities are almost endless. It reminds me of when I was younger and I'd watch art attack and he'd use circles and sausage shapes to be the framework for his drawings and it's exactly the same principle with dotting tools. So get inventive! 

I hope you find this useful and maybe it inspires you to give nail art a go! If you do try any of my methods let me know, I'd love to check them out :) 


Monday, 16 July 2012

Cray cray Leopard print Rainbow gradient

Sorry Lizzy it's not Zuza just yet :P 


I saw a design on Wahnails instagram of these rainbow leopard print nails and I thought they were so awesome so I had to recreate, mine are a bit different and very bright! I started with a white base to make all the colours pop and to save time ;) so I used Barry M Matte white, which is an okay white, I only used two coats as I didn't need full coverage. Here are all the polishes I used 
Barry M Matte White, Kiko 358 Peach Rose, Dior Riviera, Barry M Cyan Blue, Kiko 355 Canary Yellow and China Glaze I'm with the Lifeguard 
Kind of a teaser for what's to come in like 5 seconds hahahhaha 
I used the on the sponge method, I love how the colours blended together to make new colours :) I am in LOVE with Lifeguard, it's so neon hahaha. In real life this is very bright and vibrant. Next is the leopard print on top of this cray cray gradient. 
Left hand in natural light 

Right hand in natural light 

I love the way the gradient on my right hand turned out the best, it's so pretty! I wish you could see how bright this is and how fun it looks. All we need now is sunnnnnnnnnn stupid England, I swear we are never going to get summer here :(. I freehanded the leopard print using my new and improved Wah nail art pen in black, I have a much better experience with that pen now that it's changed haha.
The gradient looks so much nicer in real life not as sludgy as it looks on the first picture. I'm happy happy happy with this and my photos too. I think I'll start doing photos of both my hands when I do nail art from now on so you can see that I do it on both nails ;). 


You like how I've decided to get all fancy with my photos? I want my blog to look good and I should put my degree to use ;). I got my results and feedback through the post today and I'm very pleased with myself, I got a 2.1= overall which is good to say I never studied photography in college, it goes to show that you can do anything you want! I love this course so much, I can't wait to start my second year in september!! Wooooo. 

Sunday, 15 July 2012

Naily question time...ask away!

Me again! Ha, now I wondering if anyone would like to ask me any questions about anything nail related really or request any tutorials etc as My guide to nail art post went down quite well and it felt good to make it. Shall we say leave your questions in the comments until next sunday and this time next week I'll answer them all? Don't be shy, ask away! You may or may not know but I am currently doing my degree in Photography so if you have any questions related to terms etc then  ask away and I'll do my best to explain them. If you want to see my stash etc let me know, that counts as a question ;). I know my blog isn't big but I feel I am friendly and could help some people and also it'd just be an interesting post :). 


If you have any mani requests as well ask an I'll do my best to do them :). 


I'm currently working on making a part two to the nail art post and a post about where I get inspo etc so keep peeled for those :). 

Saturday, 14 July 2012

Nails Inc Chester Terrace swatches

Hi, it's pooey weather here which gave me an excuse to wear a darker colour namely one from my Lucky Dip, I figured that I should give them a chance ;). I chose Chester Terrace and as usual I found maybe one swatch! So it was a nice surprise when as soon as I put it on it started drying to a satin finish! I say satin as it's not completely matte it has a velvety glow to it rather than being flat. As I've come to expect with Nails Inc it was a pleasure to apply, a perfect formula! I used three coats although two was sufficient. I did three as my ridges were crazy visible! My base combo isn't working anymore so I think I may bite the bullet and try buffing :/ I'm scared to do it though as I've always had healthy nails and I don't want to ruin that y'know. 


The polish is a deep teal in the bottle and when it's on my nails it turns quite blue but never black, I meant to take a picture before it dried but I wasn't that quick ;). I'm hoping that the other colour I got in my lucky dip is from the same 'texture' collection, that'd be sweet!
See what I mean about ridges and tipwear? Natural light 2 coats
Just to show off my points ;) and because the polish looks smooth and unblemished here! Flash 3 coats
(Sorry about the photos apparently I had my eyes shut when I was taking all of my pictures...) 
It's really nice, my nails feel like they are wearing leather or something it's kinda hot ;). 
The only down side to this is that I've had major chippage and tip wear after a couple of hours :( boo. Do you like how my nails are getting pointier? Cos I really do, I want bad ass nails, nail swag cos I'm a nail junkie ;) No nails no life right!?! Hahahahhaha 


I've finally gotten round to buying a glass file and ooooffft I just love it! It really does finish off your edge perfectly and it take the chore out of filing which we all know can be a bore. With this nail shape I'll never have to use clippers again on filing so the thought of being able to use a nice glass file that should last years is a good one. Oh yeah and I love the little black velvet pouch, soooo good to feel ha!

Thursday, 12 July 2012

Nail mail time :)

Lizzy and I did a swap just last week and I got mine yesterday! I couldn't believe it arrived before hers has :( We arranged for her to send me 3 polishes but she sneaked in a forth :P 
Hello Kitty from Texas :) hehehe

China Glaze Cha cha cha and I'm with the lifeguard, Zoya Myrta and Zuza. Myrta was the surprise as she knew how much I loved it when I saw her swatch it :) she's a sweetie! 
I cannot wait to swatch them, I just know that I'll be taking Zuza and Dior Saint-Tropez on holiday with me, they are perfect pool colours :).


So look out for any of these over the next few days, thanks again Lizzy, you da best :D hope yu get yours soon!

Wednesday, 11 July 2012

Cute rainy nail art

For this mani I used a drugstore polish! Long time no see, I felt I should show a nice affordable polish after all the Dior. I chose Rimmel Pro Aqua Cool which is a soft blue, verging on periwinkle I think, it's nice and mellow anyway.
Ignore my horrid cuticles, especially my index finger

I've actually used quite a bit of this polish, there's a visible usage line :O. This applies nicely as the formula is good, and the brush is tapered which makes application easy and quick. The only problem I'm having is my Seche Vite is getting really low which is making it gloopy and bubbling all over the place also when it dries it is going a bit white and it sticks up which makes it impossible to resist piggling the polish off :( I'm going to try a different quick drying topcoat as £10 is a bit steep! 
Anyway the reason for my mani is my mother, she keeps saying to me "do umbrellas it'd be so cute" and I finally agreed and they are pretty darn cute :) I decided to add little boats into the mix too cos they're too cute! (Boats are from The illustrated nail...again) 


I love how it turned out, it was fairly tricky to colour inside the black lines with the white nail art pen but I managed it but I think that those little bits where I missed add to the design, it's quite cute right? Ha the best part is the fact that it was sunny today! After days of rain when I finally do the umbrellas, one isn't needed! I wish I had my other black nail art pen though as this one is running out so I had to squeeze so hard to get a thin line out and it made it really hard to do my other hand as squeezing leads to unsteadiness and an achey thumb :(. 
I am happy with this, it's cuuuuute :). 

My nail mail came yesterday! I couldn't believe it only a week from the US is good but Lizzy's package still hasn't got to her yet :( boo. My package was full of awesomeness which I will show you tomorrow :D. 

One last thing....I won Chanel Graphite off ebay!!! WOoo I'm very excited, I didn't like it at first but now I see it's beauty, can't wait for that to get here :D. 

Monday, 9 July 2012

Dior Bitter Orange swatches

 I noticed that I'd had a few people coming to my blog to see Dior Bitter Orange swatches so I figured I'd oblige. Bitter Orange is a discontinued shade I'm not sure when it's from as I got mine off ebay for a couple of quid ;). As it's an older shade it doesn't have the tapered brush just a regular square brush which is fine with me :P. Bitter Orange is a chameleon, sometimes its orangey, sometimes pink and sometimes a pinky orange/orangey pink. Haha it is lovely, is has small silver shimmer running throughout that is straying into frosty territory but stays on the pretty shiny side. Swatches below are with one coat!!! Amazing! 


One smoothalicious coat and no topcoat. I hope this has satisfied anyone who was interested in this polish. I'd say if you can get your hands on it, go for it. It feels quite classic yet modern? It's because it's quite bright in real life and therefore looks quite youthful which is what I think Dior stands for!! :) I like it. I want to change though and do GOOD nail art. ;) I think I'm becoming a Dior collector :| also I don't know which of the new Summer Mix to get? Blue, red or pink? Ugh decisions decisions  


Sunday, 8 July 2012

Nail Fail! Mary Katrantzou inspired floral print

Yep you read that right, my first public nail fail, obviously I've had them in the past but I've just kept them to myself and swiftly removed them but I felt I should be brave and show you all. After all I did promise nail art today. 


This was meant to be my interpretation of Mary Katrantzou's spring 2012 floral print suits and dresses but it went wrong. This took me hours to do just the one hand and so I was really disappointed when it didn't look as good as I'd hoped. I created the flowers with a small dotting tool and the stems too. I first did all the flowers in white to ensure  all the colours showed up and then I did the green stems. Then I went over the white with the colours and then I did the darker colours over that. Finished with Seche Vite and decided that I really didn't like it. 


Can you see why I don't like it? They don't look like flowers and there's too much black, there should be more colour and the flowers should be more floral shaped and more green. 
So there you have it my first nail fail (on this blog at least) what do you think? 


Lastly here are my naked nails so beware!!
So I cheated a bit, but they are too stained to be seen without light coverage ;) the first picture is from earlier this year and the bottom is today! My nails look so creepy without polish on, they look on the wrong side of long! Especially my little finger nail. Would you believe I've never broke a nail in my whole life! Lol 

Hope you enjoyed. 

Saturday, 7 July 2012

Nails Inc Chelsea Swatches

I'm officially back from my mini staycation in Felixstowe :) it was really nice to get away for those couple of days. I cannot believe that it's July! It's my birthday next month :O it's come so quickly, I've been blogging since the end of january so that's nearly 6 months already!! Double :O. LOL. 


Chelsea is an extremely dark red/brown/maroon(?) it's so dark that it looks black at two coats so it doesn't really matter what colour it is as all you see is black ha. It's lovely and glossy though but I did have to do a bit of clean up which I never normally do as this polish was a wee bit prone to flooding :(. It went on nice and smooth though. 
Flash

Natural light
No topcoat here, all the shine is from the polish. This seems like a nice change from all the summery pastels and neons that are around at the moment and it's also more appropriate for our weather......rain and thunder! Pooey or what. My nails feel quite slinky in this colour, like a silky dress for ma nails ;) and they are getting longer each time I look at them! I love being able to keep them this long :D. 
Trying to remove skinny jeans with wet nails is extremely difficult!! why must I paint my nails before I go to bed? When will I learn...


This is going to be the base for some very colourful nail art that I am going to do tomorrow so keep those eyes peeled! 
I think the next time I take my polish off I will take a picture of my naked nails :O to show you the difference in length and state of them compared to how I used to have them. That should be interesting ;) Hope it doesn't scare y'all!! 


Oh yeah one last thing, does anyone know how pintrest works? I noticed a couple of my pictures are on it, I don't mind at all as there is a link to my blog and it's exposure but I was just wondering how they get there with the link? Lol I'm 19 and I don't understand a website what's wrong with me ;)

Thursday, 5 July 2012

The illustrated nail inspired lace nail art

Mouthful or what :P 
I LOVE Sophie Harris-Greenslade aka The Illustrated Nail, she does some cray nail art, she's one of the best in the biz and I took the time earlier to properly look through her work and decide what I thought I could achieve. I orignally wanted to do tattoo style writing on my nails but then I found her lace designs and I loved them so cute. I used her designs and then made one of my own using hers as a template as I don't like to just copy, you have to add something that's your own. But my point is she's amazing! 


I love the thumb the most, it's so cute like a little doily :P my ring finger didn't turn out as well as I'd hoped, I didn't do the flowers large enough but oh well it's still nice :) I like this look but I prefer  Sophie's version :). This was really quick to do on top of Essie so that's always nice and it doesn't really matter if you go a bit wrong as it isn't that noticeable :P.
I'm still away but I'll be back soon and I know exactly what is going on my nails ;) hehehe 
Seeyou later! 

Wednesday, 4 July 2012

Essie Sand Tropez Swatches

Hey, this is my first scheduled post woo ;) I have gone back to Ipswich till friday to see the boyfs art as it's in an exhibition and Ips is too far to travel just for the day, so we are making a mini break from it :). 


So I bought Sand Tropez as I thought (stupidly) that it would be a good match for my skintone as it turns out it's really not :P on me it's just a neutral colour kind of stone grey ie grey with brown undertones. 


It only took two coats to opacity and it was so smooth, the brush was really good as it covered my nail in one swoop ;). I still like it but it just wasn't what I was expecting. My nails have grown so much but you can't really tell, my thumb nail measures 2cm from base to tip! Lol that's quite long but I still want them a bit longer so I can shape them properly. I love my oval/points now I can't see me ever going back to square! 


Just a quick post today! Hope everyone's having a good week
 

Abbienail Copyright © 2011 -- Template created by O Pregador -- Powered by Blogger